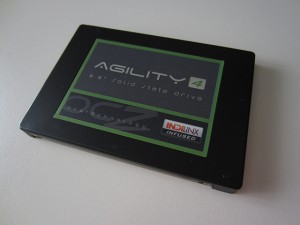
 Upgrading your computer with a solid-state hard drive is probably one of the most beneficial upgrades you could make. Boot-up times decrease tremendously and programs launch almost instantly. I finally made the plunge to an SSD recently and haven’t looked back.
However, many of the how-to guides that I needed in order to properly install my SSD turned out to be pretty vague, which left me in a rut halfway through the installation. So, I’ve decided to write a proper how-to on installing an SSD in a MacBook Pro.
Note: This method can be easily translatable to any other laptop or computer, so if you don’t have a MacBook Pro, you can still follow along with your own laptop and successfully install your SSD.
Materials
- Your new SSD!
- A small towel
- Phillips precision screwdriver
- Torx T6 screwdriver
- OS X install disc or flash drive
Disassembling your laptop
First thing’s first: Completely turn off your laptop and make sure it’s unplugged from its power source. Lay down your small towel on your desk, table or any other flat surface and put your laptop on top of it with the bottom side up. The towel will prevent the laptop from getting scratched up while its laying on the hard surface.
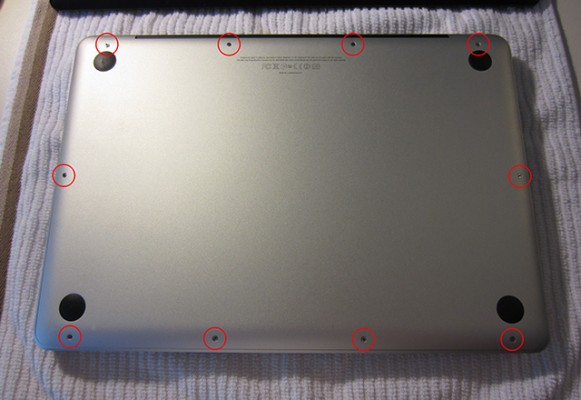
Next, remove the screws from the bottom plate. These are the ten screws that are placed on the outer edge (pictured below). The screws are very tiny and can be lost easily, so put them in a small bowl — just make sure you know where they all go (three of the screws are longer, and they go in the top three holes to the right. Other than, it doesn’t matter where the rest of the screws go since they’re all the same).
After you remove all the screws, carefully lift up the bottom plate to reveal the innards of your MacBook Pro — it should pop off pretty easily.
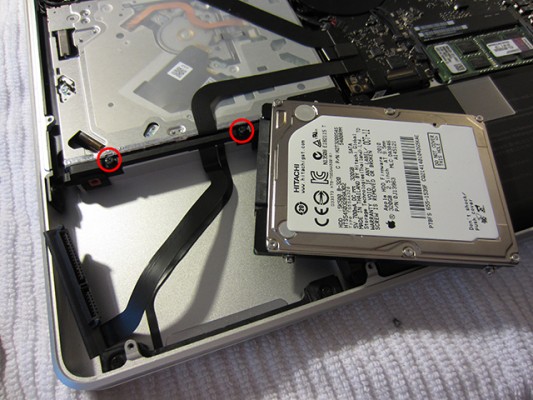
The hard drive is located in the bottom-left corner. There will be a plastic tab that you can pull on to get the hard drive to pop out, but before you do that, you have to remove a small black plastic retaining bar that holds the hard drive in place. It’s located directly north of the hard drive and is held down by only a pair of screws (pictured below).
Remove the bar and pull on the plastic tab to pop out the hard drive. Make sure not to get too greedy, since the hard drive is still attached to the laptop via the SATA cable. In this case, the SATA cable is an extremely thin ribbon cable, so be extra careful here when unplugging it.
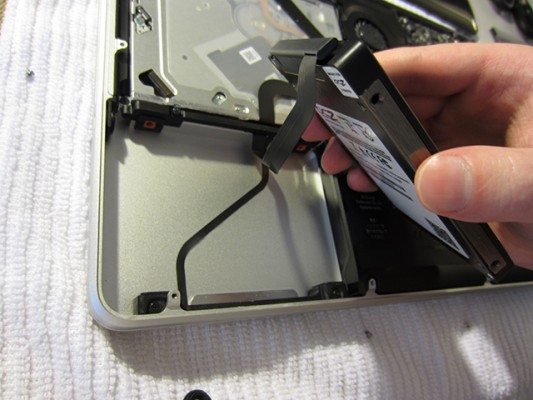
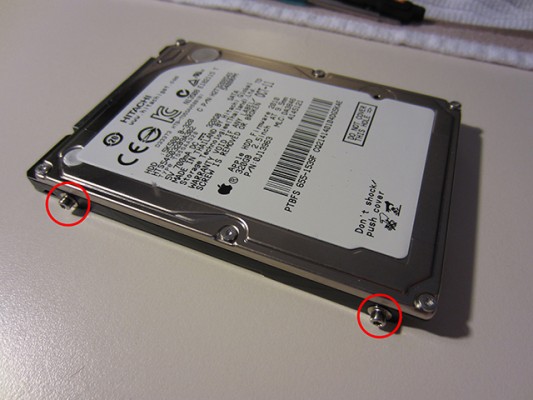
Once the hard drive is completely out, unscrew the four torx screws on the sides of the hard drive using your T6 screwdriver (below). You’ll need these screws for your SSD, as they’re essential to holding the drive in place while it sits inside your laptop.
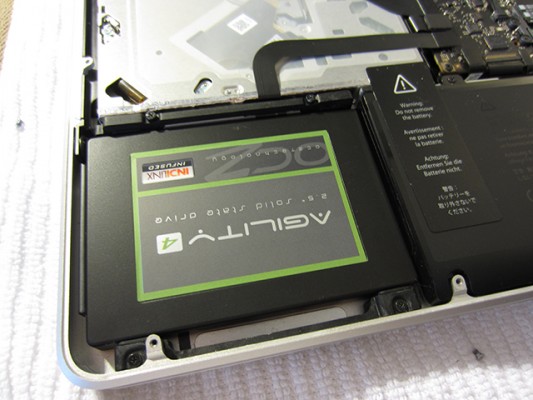
Go ahead and put the four screws on your SSD. All there is to do now is to plug in the SATA ribbon cable to your SSD, mount it inside, put the retaining bar back on, reattach the bottom plate with the screws, and the hardware portion is all done!
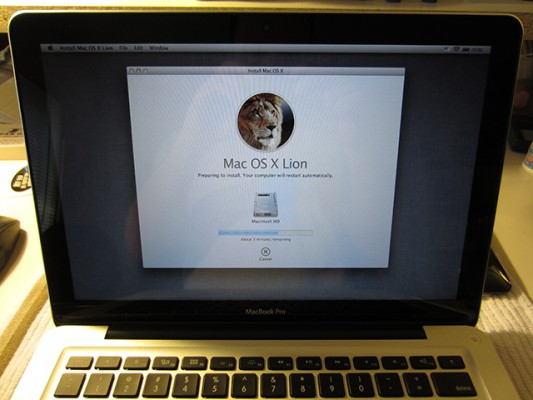
The last thing to do is insert your OS X install disc (or plug in your OS X boot USB drive), hold down the alt/option key during the boot process, and then install OS X like you would with any other drive.
Congrats! You’re all done and you should now be experiencing blazing fast speeds.

Leave a Reply
You must be logged in to post a comment.