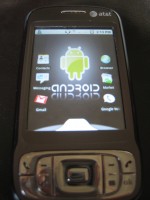
 Edit: Android can now be directly installed to NAND on the Kaiser. Flashing to NAND will allow direct booting to Android and complete replacement of Windows Mobile. NAND installation requires a HardSPL, while the method described below does not. For details on NAND flashing, please check this thread.
Since its launch, Google’s open-source linux-based mobile OS, Android, has been a welcome addition to the market. During the past few months, enterprising hackers have been working to get Android running on phones which do not natively run the OS.
There are currently a number of phones which are capable of running Android, and this guide will specifically walk through the details of getting Android running on the HTC Kaiser (AT&T Tilt).
Things you’ll need:
- A supported phone
- At least a 512 MB micro SD card formatted with FAT 32 with enough space for the Android files.
Android requires a set of files in order to run properly:
- zImage – This is the linux kernel
- system.img/sqsh – This file stores the UI and some OS files
- default.txt – This file has the linux boot parameters.
- Initrd.gz – init ramdisk
- rootfs.img/sqsh – Root filesystem image
- user.conf – This may also be included. It allows you to run shell scripts upon system startup.
- haret.exe – this is the Linux bootloader. You’ll need this to boot Android from within Windows Mobile.
- media folder – This contains android default ringtones and other media.
Limitations of current Android builds on the HTC Kaiser:
- Directly booting to Android (Must boot via haret.exe)
- The camera does not work
- Bluetooth does not work
A Few Notes Before Installation
By installing Android, you will not actually replace Windows Mobile. You must boot to Android via the linux bootloader (haret.exe). While it is an inconvenience to not have direct booting to Android available, this does mean that you can run Android on a completely unmodified phone.
Installing Android
Current packages can be found in the xda-developers forums: http://forum.xda-developers.com/forumdisplay.php?f=602
To install, unpack the package or assemble the files needed and place them in the root of your SD card. Once done, open haret.exe and select Run. Android should begin booting at this point. If it is your first boot it may take longer since it needs to create the data.img file which will contain all of your downloaded apps and settings.
Once booted, you’ll be prompted to login to your Google account. If you do not have one, there is an option to create one. In order to login or create a Google account, you’ll need to ensure the data connection is working. If it is not working you can skip the account login process and enable your data connection.
If your connectivity is not working after the initial installation, you may need to update or add your carrier APN. To do so, navigate to Settings > Wireless Controls > Mobile networks > Access Point Names then click the menu button and select New APN and enter in your carrier APN info (APN Carrier Info is available here: http://www.androidonhtc.com/old/carrier_network_settings). Once the APN information is in, you can test the connectivity with the Modem application.
With the data connection working, you can then login to your Google account. This will pull down all of your emails and contact information from Gmail. To ease the process of getting your contacts into your Android phone, you can import them into Gmail. (Guide here: http://mail.google.com/support/bin/answer.py?hl=en&answer=8301).
Once you’re connected with your Google account you can enjoy the full glory of your new Android phone.
I highly recommend browsing through the market and checking out the apps available. Here are a few of my favorite picks:
- Twidroid – Twitter Application
- ConnectBot – SSH Terminal Application
- Google Voice – Google Voice Application
- The Weather Channel – Weather Application
- Pandora – Pandora Music Application
If you have any questions, feel free to ask them in the comments.

Leave a Reply
You must be logged in to post a comment.