 Do you have an older computer sitting around and don’t know what to do with it? An old computer can be repurposed to serve as a TV, print server, file server, music server, kitchen recipe computer, and much more.
I’ll take you through a few of the ideas, including the things you’ll need and give you a general push in the right direction to help you get started.
The TV Computer
What you’ll need:
- TV with VGA, DVI, HDMI or, as a last ditch effort, S-Video input (an LCD will make this way more awesome)
- Video card that supports one of the above outputs
- Wireless card if your router isn’t close enough to run a cable
- Wireless keyboard and mouse
- A spare computer monitor for setup (if you have a tube TV with S-Video)
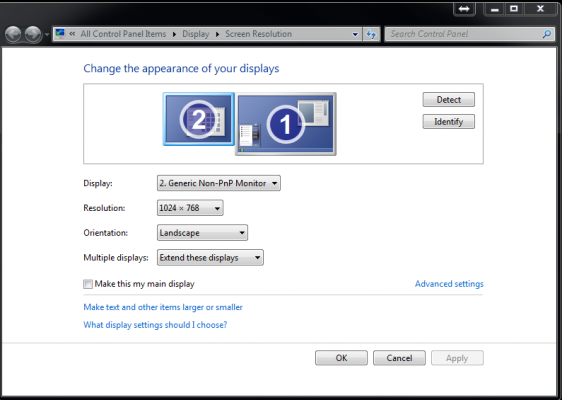
I’ll mostly cover the setup for a tube TV with S-video. The concept is the exact same for a flat panel, you just don’t need a second monitor.
Plug the computer into a spare monitor and hook up the keyboard and mouse to start installing all the programs you’ll need. Install your browser of choice to access Hulu and Netflix, and install iTunes so music can be controlled via devices like the iPod Touch.
After getting that all set up nicely, plug in the S-Video cable to the TV set. A small issue with a tube TV and S-video is that the resolution is not very high, and Windows 7 does not like to go below 800×600, so consider using newer LCD or plasma TV. Just plug in a DVI or VGA cable for video and a 3.5mm cable for sound.

This setup works great if you do not have cable TV as you can stream plenty of content through Netflix, Hulu and other web based entertainment sites. The PC has become my DVD player as well, and if you have a Slingbox this will also do a great job.
If you invest some money into a capture card on a higher-end PC, you can have your own DVR and not pay the cable company for their DVR service. The capture card will require a computer with hardware like a dual core processor and 2 GB of ram, depending on the card.
Print server
What you’ll need:
- Computer running XP or better (or OSX/Linux if you’re familiar with them)
- Printer with USB or LPT port
- Network capabilities
- Monitor for setup
- Mouse and keyboard
If you are not fortunate enough to have a wireless printer, or have to share your printer with other people, don’t go buy a fancy new printer; you can just follow these steps and put that old computer to use. This can be particularly useful in a college house with several roommates who need to print PowerPoint slides and lecture notes.
After the initial setup, this computer won’t require a permanent monitor, mouse, or keyboard. Set the power settings to save power, and make sure you have “wake on LAN” enabled so when it gets a signal from someone to print it will come out of standby mode. Make sure you don’t set a password on the user account, so the computer is ready to go right when it starts up.
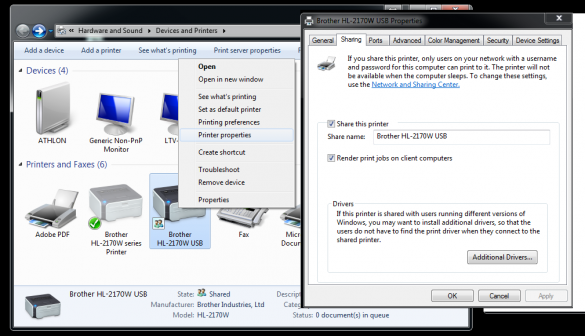
Manually assigning an IP address would also be a good idea so you can always find the printer computer on the network. The computer should finally be configured to share a printer over the network.
On the computers that will print to the print server, you need to add a network printer at the IP address assigned before. You should now be able to share the printer with anybody who needs it, driver free.
Side note: Installing some sort of VNC software so you can administer the server from a different computer without needing to hook up a monitor will save you headaches later.
File Server
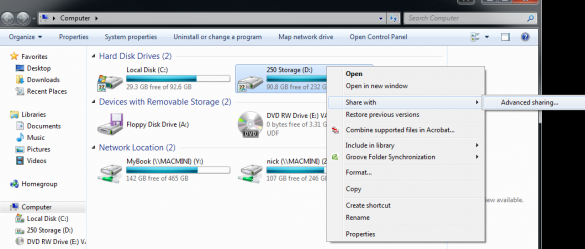
Setting up a file server is very similar to the print server setup, except that you enable a folder to be shared instead of a printer.
What you’ll need:
- Computer running XP, Vista, Windows 7, OSX, or Linux
- Network connection (Gigabit LAN will make it much faster if you have the proper equipment)
- 250 + gigabytes of storage space, or what ever you see fit
Much like the printer setup, you first need to get a fresh copy of your OS of choice installed. Once that’s done, create some folders to put your shared data in. Windows makes user control pretty easy, letting you set permissions on each folder on a user-to-user basis.
Linux can offer a more secure way for this if you know what you are doing, but Samba isn’t as fast as Windows-to-Windows transfers. Most importantly, you needs to consider the operating systems of the people who will use the server. If everybody uses Windows, then a Windows server is best. If you have some Apple computers mixed in with the PCs, Linux may be your best choice. Also, if you have OSX running and you’re sharing from an NTFS drive, you WILL have slower read/write speeds. You’re better off formatting the drive as FAT32 or JFS.
Side note: Just like the print server, you’ll probably want to install remote access software so you can access the computer later.
The Music Server
What you’ll need:
- Computer with iTunes installed
- Network connection (doesn’t have to be very fast)
- Receiver or good speakers
- iPod Touch or iPhone with remote installed, a PowerPoint remote control, or some other way to change the song wirelessly
- Depending on your sound system. you may need a better sound card in the PC
The first step is to open iTunes and allow the device to change songs on that computer. Installing a Pandora or Last.FM client may also be a good idea if this computer has a permanent monitor. Next, hook the computer up to some speakers or a receiver and control the music via the device you set up earlier. As before, installing VNC software for remote administration is a good idea.
Side note: iPod Touches have a fun DJ request function with iTunes.
Other uses for old laptops
- DVD player
- Car computer (requires a power inverter)
- Kitchen computer
- Digital picture frame
- Linux box!
- User account management server
What uses have you found for old computers? Let us know in the comments section below!
Image credit: manuelfloresv


Leave a Reply
You must be logged in to post a comment.