 The release of Microsoft Office 2007 brought some major changes to the popular office suite. Many did not care for these changes at first, but users soon started to enjoy the newest features of Word, Excel, and other Office 2007 programs.
One feature in Office 2007 still seen in Office 2010 is a change in the default font from Times New Roman at Size 12 to Calibri at Size 11. While the new font may be an improvement, many users have been frustrated if their documents must by typed in a particular font and they are constantly needing to change from the current default.
In this guide I am going to show you how to set some of the default document settings in Microsoft Office Word 2007 and 2010.
Setting the Default Font
Step 1: Start Word.
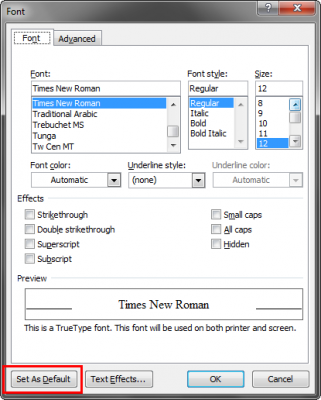
Step 2: Click the small arrow at the corner of the Font section of the Home ribbon to open the Font dialog box. You can also right-click the document and select Font… from the menu.

Step 3: Set the font and font size you wish to have as the new default settings and click Set As Default in the bottom corner of the window.

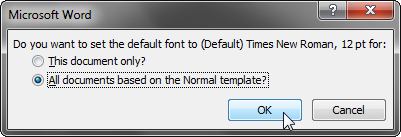
Step 4: Confirm that you wish to make the changes to All documents based on the Normal template and click OK.

Step 5: Close and re-open Word and your new default font is set.
Setting the Default Indents and Spacing
Step 1: Start Word.
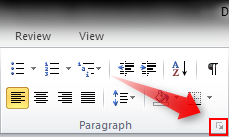
Step 2: Click the small arrow at the corner of the Paragraph section of the Home ribbon to open the Paragraph dialog box. You can also right-click the document and select Paragraph… from the menu.

Step 3: Select the alignment, indentation, and line spacing you wish to have as the new default settings and click Set As Default at the bottom of the window.

Step 4: Confirm that you wish to make the changes to All documents based on the Normal template and click OK.

Step 5: Close and re-open Word and your new default alignment, indentation, and line spacing settings are set.
Setting the Default Margins
Step 1: Start Word.
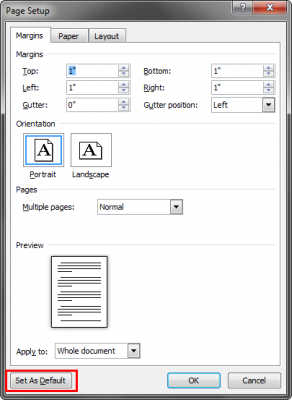
Step 2: Select the Page Layout ribbon and click the small arrow at the corner of the Page Setup section to open the Page Setup dialog box.

Step 3: Select the margin, orientation, and paper settings that you wish to have as the new default settings and click Set As Default at the bottom of the window.

Step 4: Confirm that you wish to make the changes to all documents based on the NORMAL template by clicking Yes.

Step 5: Close and re-open Word and your new default margins, orientation, and paper settings are set.
Have any other tips for using Microsoft Office? Share them with us by commenting below!

Leave a Reply
You must be logged in to post a comment.