
 Test driving and installing a Linux distribution has become a lot easier over the years. In the early days, you needed to install Linux on a dedicated computer. Or, you could set your computer up to dual boot. Of course that meant navigating the potential perils of partitioning your hard drive.
Later, a Live CD (which lets you run the distribution right from a CD) was the way to do it. The problem with a Live CD, though, is that running anything from a CD is slow. And having to burn a CD for each distribution that you want to try is wasteful.
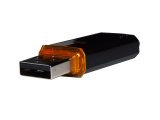
A better option is a bootable USB flash drive. You can reuse it and any distribution you install on it has the potential to run very quickly.
Whether you’re using Linux, Windows, or Mac OS you can easily create a bootable USB drive using UNetbootin. Let’s take a look at how to do that on the Linux desktop.
Note: Some of the options covered in this post aren’t available in the Windows and Mac OS versions of UNetbootin.
Installing UNetbootin
Just go to the UNetbootin site and download the installer for your operating system. There are buttons at the top of the page.

You can also get packages for the following Linux distributions: Ubuntu, Debian, Fedora, SuSE, Arch, and Gentoo.
Once it’s installed, you can start UNetbootin from your applications menu. In Ubuntu, for example, select Applications > System Tools > UNetbootin.
Creating the Bootable Drive
First off, you’ll need a USB flash drive. At the very least, it should have a capacity of 1 GB. Just to be safe, use either a 2 GB or 4 GB drive.
UNetbootin has an interesting feature: it can automatically download and create a bootable flash drive for over 20 popular Linux distributions. That saves a lot of time and trouble!
The distribution that you want may also need an ISO image. An ISO image, which has the extension .iso, is a compressed version of an operating system. That includes everything — installer, file system, and all the collateral.
From there, fire up UNetbootin.

If you’re going to create a bootable drive from one of the supported distros, select it from the Select Distribution list. Then, choose the version that you want to use from the Select Version list.
If, on the other hand, you’re going to create a bootable drive from an ISO image, click the Diskimage option. Then, click the “…” button to find the ISO image that you downloaded.
From there, make sure that the Type list is set to USB Drive and the Drive option is set to /dev/sdb1. In Linux, /dev/sdb1 is the default mount point) for removable storage devices.
Note: In Windows, the option will be a drive letter like F:**. In Mac OS, it will be something like /Volumes/USBDRIVE/**.

When you’re ready to go, click the OK button. It can take several minutes for the UNetbootin to write the files to the flash drive. When the process is finished, a message appears asking if you want to restart your computer. You can safely ignore the message.
Using the Bootable Flash Drive
Restart your computer with the flash drive plugged into a USB port. Chances are your computer’s boot sequence — which tells your computer which drive (hard drive, CD-ROM drive, or removable drive) to start from — will skip the flash drive the first time you try this. When your computer starts, you need to go into the BIOS to change the boot settings. Depending on your computer, this could mean pressing the F2 key or F10 key on your keyboard. You’ll have to do this quickly.
Once you’re in the BIOS, find the boot settings and make the removable drive (your flash drive) the one from which your computer boots first. You can find detailed instructions on how to do that here. Then, exit the BIOS. Your computer will restart and boot from the flash drive.
From there, a menu will appear. Just choose the option to run in live mode and then take the Linux distribution for a spin.
Photo credit: gytha_ogg
Leave a Reply
You must be logged in to post a comment.