 One of my favorite features of Windows 7 is the improved search. Windows Search is quickly available in the Start menu or in any open Explorer window.
To improve search performance, Windows 7 uses a background indexing feature. Indexing pre-searches specified locations on your computer and compiles the results into the search index. When you search, you’re computer is not having to search the entire hard drive, but just the indexing file.
Below are a couple of tips I’ve found to be useful for tweaking the Windows 7 search.
Adding and Removing Indexed Locations
As mentioned above, indexing in Windows 7 allows you to quickly search common locations of your hard drive. By default, Windows 7 indexes only a couple of key locations on your computer. Adding your custom file locations can greatly improve your search capabilities in Windows 7.
I have recently added a couple of external hard drives to my computer and would like Windows 7 to always index them. Here’s how to do this:
Step 1: Navigate to Control Panel > All Control Panel Items > Indexing Options.
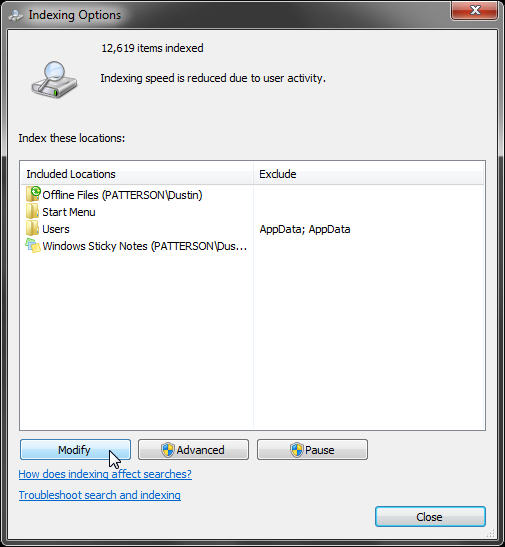
Step 2: Click on Modify.
Step 3: Select the new locations to index. You can either select an entire drive or individual sub-folders of the drive. Click OK when finished.
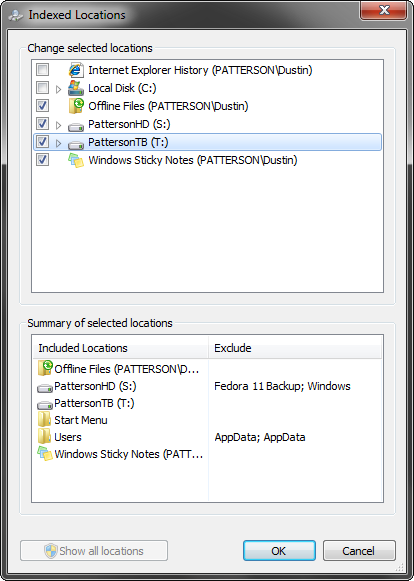
The Windows 7 Search will now include my recently added indexed drives.
Searching File Contents of Non-Indexed Locations
Scenario: You need to find a document located on a shared network drive. You don’t know the name of the file is but you know some of the content of the file. Since the shared network drive is a non-indexed location, searching in the network drive only produces results as file names without any contents.
Adding the network drive to your indexed locations would allow you to search through file contents, but considering the size of the shared drive and the large number of files located in it, having Windows constantly indexed the network drive would not be a good idea.
Windows 7 allows you to enable searching through file contents of non-indexed locations.
Step 1: In an open Explorer window, select Organize > Folder and search options.
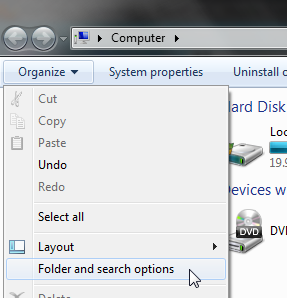
Step 2: Click the Search tab of the new window.
Step 3: Under What to search, click the Always search file names and contents radio button and click OK.
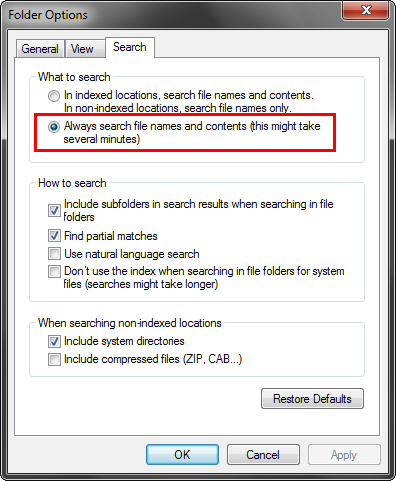
Searching the shared network drive will now present results from file names and file contents.
Specify File Types To Index
Specifying the file types to index can be useful if the locations you are indexing contain many different file types. Adding or removing specific file types from the search index can improve the search performance.
Follow these steps to add or remove file types from the search index.
Step 1: Navigate to Control Panel > All Control Panel Items > Indexing Options.
Step 2: Click on the Advanced tab of the new window.
Step 3: Select the File Types tab at the top of the next window.
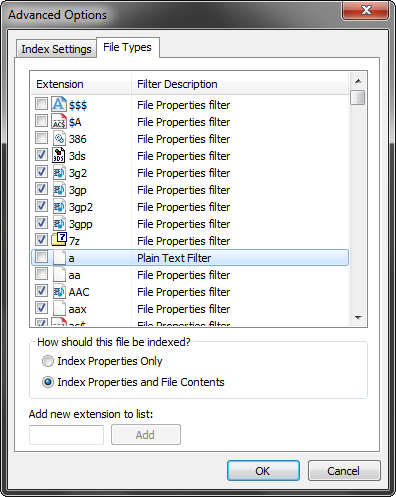
Step 4: Check and un-check the boxes for the file types you wish to index or not to index, respectively. Click OK when finished.
Step 5: You’ll receive a pop-up stating that Windows needs to rebuild the index and it may take some time. Click OK to acknowledge the warning and close any remaining open windows.
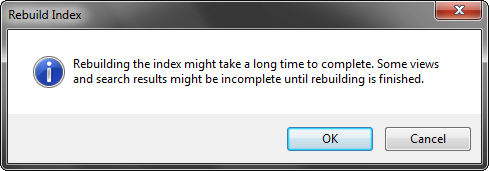
The changes to the indexed file types won’t be noticed until the index rebuilds.
Make sure to check out our other great guides about Windows 7.

Leave a Reply
You must be logged in to post a comment.