A recent Windows Update (KB977165) for Windows XP caused many computers to experience Blue Screen of Death (BSOD) errors when the computer restarted after the update. The cause of the blue screen wasn’t just the update, but rather a rootkit (a form of malware) which had been present on the users’ machines prior to the update.
The specific error is:
PAGE_FAULT_IN_NONPAGED_AREA
Technical Information:STOP: 0x00000050 (0x80097004, 0x00000001, 0x80515103, 0x00000000).
This guide will help you get your computer back into a bootable state and get rid of the rootkit. To do this, you will need a Windows XP installation disc in order to access the repair options.
Step 1: Insert the Windows XP disc and restart your computer. When the computer initially starts, you should see “Press any key to boot from CD” message which you must do. If you do not see this message, you may need to configure your computer to boot from the CD drive.
When the content on the CD has finished loading, you should be presented with a screen that looks like this:
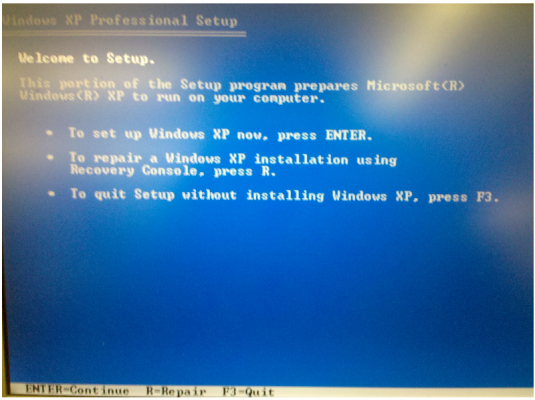
Step 2: Press the ‘R’ key to access the recovery console. You should now be presented with what looks like a DOS prompt.
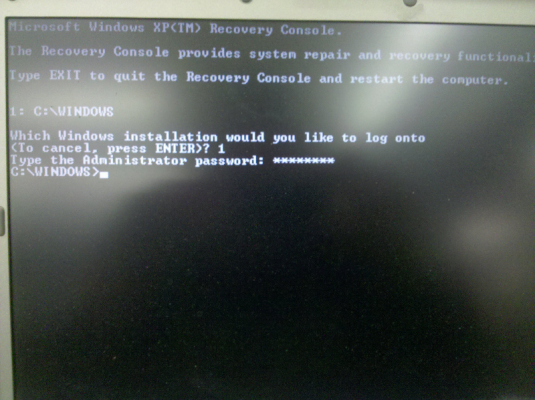
You may see multiple options when asked which installation you would like to log into. The one you want should look something like the one in the picture, “C:\WINDOWS”. Enter the password for the Administrator account when prompted. If you haven’t set up a password for the Administrator account, just press Enter.
Step 3: Enter the following command (since Windows isn’t case sensitive, you don’t need to worry about any capital letters):
chdir $ntuninstallkb977165$\spuninst
and press Enter.
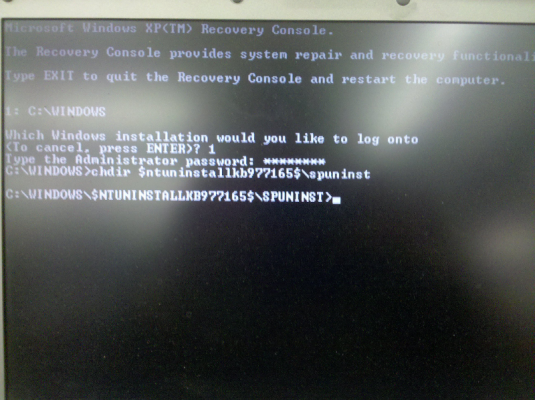
Now enter the command:
batch spuninst.txt
and press Enter
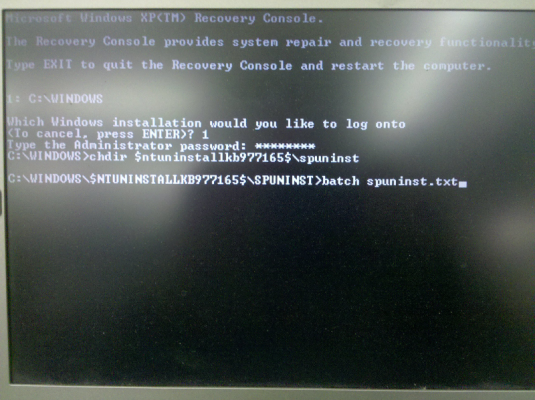
Once that procedure has finished, type ‘exit‘ and press Enter to restart your computer, and don’t forget to remove the CD. When your computer restarts it should be able to boot into Windows. We now need to perform a few final steps to remove the rootkit.
Removing the Rootkit
First we need to download and install Microsoft Security Essentials. Once it is installed, it should update itself automatically with the latest virus definitions. From the ‘Home’ tab, set the radio button to ‘Quick’ and press ‘Scan now’.
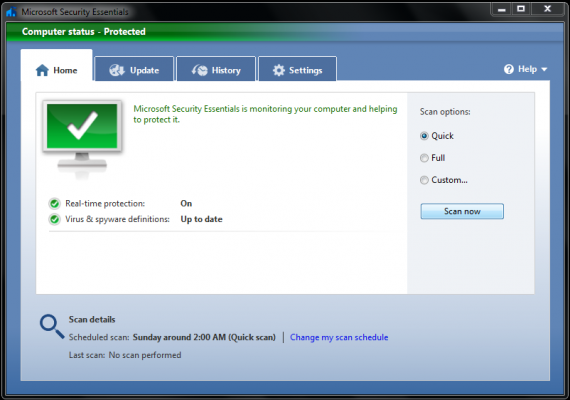
The scan might take anywhere from 10-20 minutes (or more if you’re on a particularly slow computer). Once it has finished scanning, it will present you with the option to clean up any items it found. Go ahead and do this, after which you may be asked to restart your computer.
It should now be safe to run Windows Update again, since Microsoft Security Essentials takes care of the virus that caused the problem.
Since there’s probably other malware residing on your system, it would be a good idea to install and run Malwarebytes as well, just in case. Also, make sure you’re running an antivirus program and that it’s up to date.
Please let us know how it works in the comments, or if you have any questions!

Leave a Reply
You must be logged in to post a comment.