 Have you ever been talking to someone on Skype and exhausted your vocabulary trying in vain to describe something on your screen to the other person? I’ve found myself in that situation many times. It used to be that the only option was to have the person remotely connect to my computer, which was cumbersome at the least, and at most kept me from sharing it because it would have been impossible to walk the other person through the connection process over Skype!
The latest release of Skype includes a feature that allows you to share your screen natively within the application. Not only is it a great feature, but the people at Skype have really outdone themselves by making it intuitive, smooth, and of high quality.
If you already have Skype installed, make sure to update it to the most recent edition by going to Help –> Check For Updates and let it install. If you do not have Skype installed, you’ll need to install the Skype client and set up an account. This is very straightforward to do: download the client at http://www.skype.com, run the installer, and follow the on screen prompts.
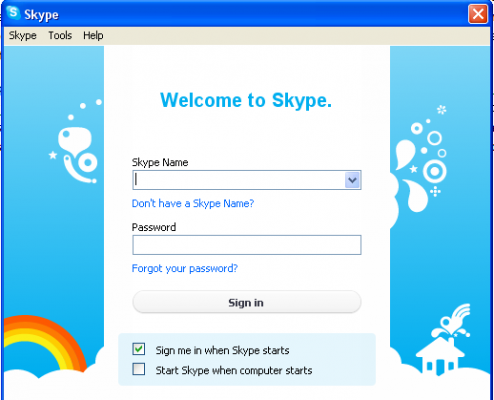
Once the client is installed and Skype has started, it will prompt you to log in. If you already have an account you can login immediately, if not, you can create one from within the program.
 After you have logged into Skype, you will need to add some contacts. That is outside the scope of this article but Skype is fairly intuitive and has decent help if it isn’t making sense. After you have added a contact, call them!
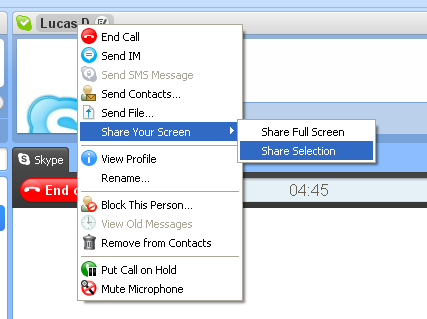
To start sharing your screen, right click on a contact’s name either in the contact list or at the top of the call screen. In the drop down menu, you will see a selection that says “Share Your Screen”, where you can choose whether to share you entire screen or just a specific area.
If you picked “Share Selection” a window will pop up that allows you to pick the selection. The window can be resized and dragged around just as any other window to include whatever you want to in your selection. Once you have what you want to share in the window (don’t worry if it isn’t perfect, you can adjust it later) click on “Start Screen Sharing.”
 After you click the button, the window will change to a red outline and the selection will be shared. If you want to change the selection size, simply click on the down arrow and drag to resize the window. You can make the selection size full screen by clicking the ‘full screen’ button.
The quality of Skype’s screen sharing feature is very impressive. When sharing a word document or a web page, the text is easily readable by the other person and for the images are just as good if you were looking at the page on your own computer. There is a minor amount of lag when scrolling and changing pages, but it isn’t disruptive. Viewers also have the ability to take screenshots of the screen you are sharing, which is a great feature.
As a test of the transfer rate, I tried watching a video through the screen share. When the video did not contain much movement it worked well, but during large amounts of movement, the transfer rate decreased significantly.
One thing to consider when using Skype is you’re the speed of your broadband connection. I was using a fast connection, but if you’re on a slower line (or are using other bandwidth-intensive applications like VOIP at the same time), you may have a decrease in quality.
I am very pleased with the new screen sharing feature in Skype. Not only does it allow for easy, high quality screen sharing, but it also has seamless integration into the Skype user-interface. And the best part? It’s free!


Leave a Reply
You must be logged in to post a comment.