Watching movies or TV episodes is probably one of the top things most people do with the iPad. You can rent or purchase movies through iTunes, but what if you want to watch a DVD on your iPad that you already own? You can convert your existing movies into a file format that is iPad friendly.There are plenty of sites offering free DVD converter software, a good number of which attempt to up sell you into a paid product.
The program I chose for importing DVDs is Handbrake. This software works the same way on both the Mac and the PC, however, for this how-to, I used a Mac.
Here is a step-by-step guide on how to rip movies from DVD.
Step 1: Download and install required software
First you’ll want to download Handbrake. This software is free for both Mac and PC. You’ll also need to install the equally free VLC media player.
Step 2: Insert the DVD
You will need to insert your DVD into the computer that you are using. This may cause your computer’s DVD player to launch and begin to play your DVD. If that occurs, press stop on the DVD player and be sure to completely exit the program.
Step 3: Open Handbrake
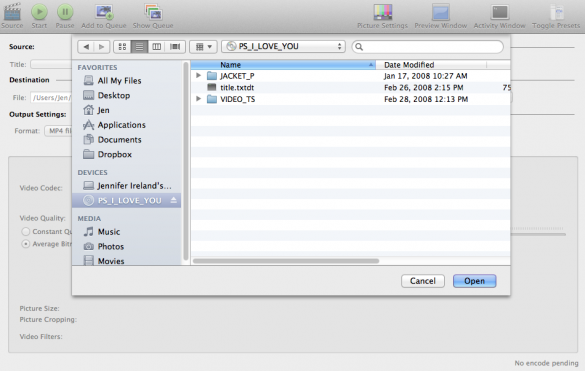
Upon opening Handbrake, it will bring up a window that looks like the one below. Handbrake is asking you what source that you would like it to scan for files that it can convert. In this case, you will direct Handbrake to the DVD that you have inserted into your computer. In the example above, the DVD is entitled, “PS_I_LOVE_YOU”. Select the contents and click Open.
Step 4: Allow Handbrake to scan the DVD
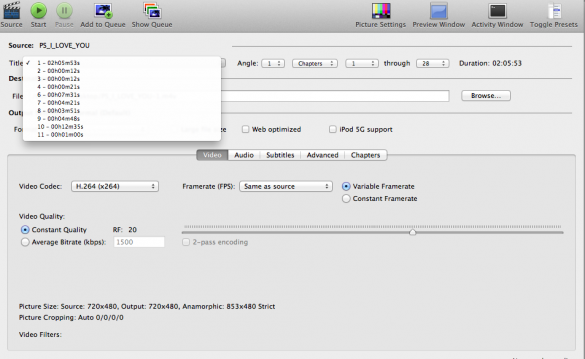
Handbrake will scan the DVD for the movie file to convert. It will automatically select the file with the longest time duration to convert, which is almost always the movie that you want on your iPad. As you can see in the picture below, while there are many other files on the DVD, the longest file is selected is the movie.
Step 5: Choose a location on your computer to save the movie
Click on the “Browse” button in the Destination section of the window. This will allow you to choose the destination where Handbrake will save the file. You may want to save the file to your desktop so that it will be easy to find later.
Step 6: Rip the movie to your computer
Click on the “Start” button at the top of the window and allow Handbrake to do its magic! Your movie is now being saved to the location you selected in a file format that the iPad can use. This process can take a while, depending on the speed of your computer.
Tip: Do not let your computer go into sleep mode during this process, the movie will stop ripping and you will not get a complete file.
Step 7: Move the converted movie into iTunes

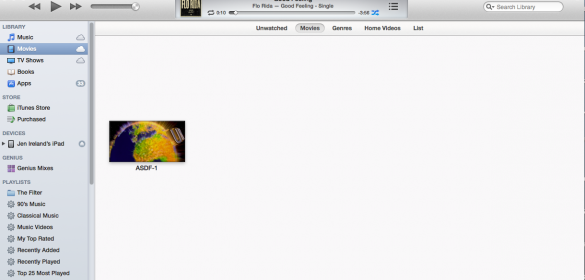
Now it is time to move the movie file (that you decided where to save in Step 5) into iTunes. In order for this to happen, simply select the movie file and drag it into the movie section of the library on the left-hand side of the iTunes window and drop it there. iTunes will begin to import the movie into its files at this point. The movie will show up in the “Movies” section of your library with the original title of the file.
Step 8: Sync the movie to your iPad
Select your iPad from the menu on the left-hand column of iTunes and select “Movies” at the top of the iTunes window. Be sure that the box next to “Sync Movies” is checked and the box next to “Automatically sync all” (in the drop-down menu) movies is NOT checked. Browse to the movie that you just imported into iTunes and check the box next to it. Select the “Apply” button in the lower right-hand corner of the iTunes window and your movie is happily being synced to your iPad.
Step 9: Open the movie on your iPad
Open up the Videos app on your iPad and verify your movie is there. Select it and you can now watch your movie without needing Wi-Fi.
This may take you longer the first few times you do it, but before you know it you will be a pro.


Leave a Reply
You must be logged in to post a comment.