One of the most difficult restrictions for a SharePoint developer to deal with can be the requirement to do development on a SharePoint server. Personally, I prefer doing my development on my local machine, eliminating the need to establish a remote desktop connection to a different machine in order to write code.
Unfortunately, SharePoint development requires many DLL files which are included with an installation of SharePoint on a server. To make matters worse, SharePoint 2010 requires an x64 server, further complicating the issue. Fortunately, there is an easy workaround that can allow a SharePoint developer to be productive, even while using their laptop on the road without an available internet connection.
Copy the SharePoint DLLs
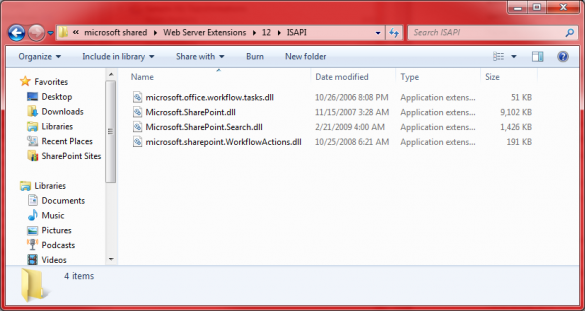
As I mentioned before, SharePoint development requires DLL files that are included with a SharePoint 2007 or 2010 installation. The first step is to grab these off of a SharePoint server. For SharePoint 2007, they are located in the hive at C:\Program Files\Common Files\Microsoft Shared\Web Server Extensions\12\ISAPI\, and for 2010 at C:\Program Files\Common Files\Microsoft Shared\Web Server Extensions\14\ISAP\. Copy the DLL files in this directory from the server, and paste them at the exact same file path on your local machine. Since your PC likely does not have SharePoint installed, you may have to create the directory structure yourself.

Register the Assemblies to the GAC
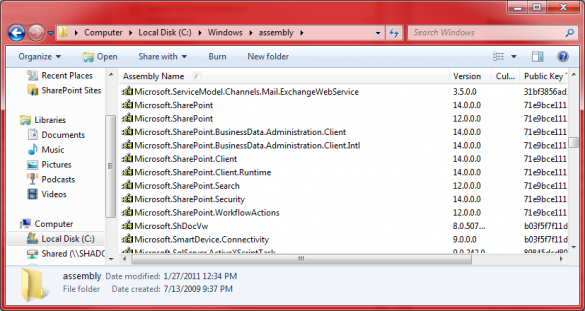
Now that you have the DLL files on your workstation, you will be able to include them as references in your Visual Studio projects just as you would with any other DLLs. However, if you want them to auto-register with your project when you use a Visual Studio 2010 SharePoint template or a WSPBuilder template, you must register the DLL files in your local Global Assembly Cache. To do this, open the directory on your workstation that contains the SharePoint DLLs and drag them into the C:\Windows\assembly\ directory. This will register them with the GAC on your workstation, and Visual Studio should successfully find the assemblies when a template is loaded up. Although these assemblies may be 64-bit, this will work fine even though your workstation may be 32-bit.

If you’ve successfully completed the two steps above, you should be able to write your code and successfully compile your project. Once you generate your WSP file, you can then deploy it like any other WSP.
Please Use Caution
If you do development for both 2007 and 2010, you can do this for both on the same workstation; just be sure to complete both steps for each version. Since the 2007 and 2010 assemblies have different Assembly Versions (12.0.0.0 and 14.0.0.0), you don’t have to worry about conflicts in the GAC. Be sure to use caution, however, because in my experience, Visual Studio tends to grab the SharePoint 2010 version of the DLL even for a SharePoint 2007 project if they’re both registered on your workstation. If this happens, remove the incorrect reference, and add a reference to the correct 2007 DLL from your 12\ISAPI directory.

Leave a Reply
You must be logged in to post a comment.