 Let’s say that, hypothetically, someone read a Techerator article on the new features of Ubuntu 10.1 and decided that they wanted to try it out. After messing around with the Live CD, they opted to do the Ubuntu install inside Windows (Wubi) so that they could still play around with both operating systems without messing up their hard drive.
Now let us assume, hypothetically, that this person’s Windows OS decided to stop working altogether (not because of Wubi, but just because of the laws of computer nature), and now they want to throw caution into the wind and partition the heck out of their hard drive to run both Windows and Ubuntu at the same time.
What’s the best method? Programs like Partition Magic and EASEUS Partition Master do the job just fine and dandy, but is there an easier way? All hypothetical notions aside, let’s explore a few quick alternatives to hard drive partitioning for dual booting Windows and Ubuntu.
Important Note: Modifying your operating system partitions is inherently dangerous and can result in data loss if something goes wrong. Before following any steps in this guide, make sure you feel comfortable with the procedures detailed below, and above all – make a backup!
Modifying A Windows Volume for Free Space
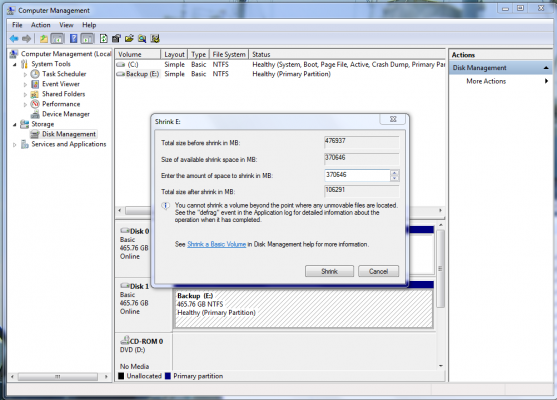
If you’re using Windows 7 or Windows Vista (sorry XP users), Windows has an option for you under Disk Management that allows for the disk space of the hard drives to be shrunk. To do this, go to Control Panel -> Administrative Tools -> Computer Management -> Disk Management. Then just right click on the partition in question and select “Shrink Volume…” to free up disk space.
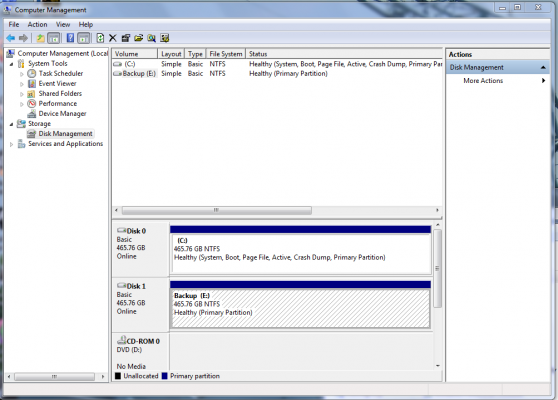
Windows will let you know how much space can be trimmed from the partition (so that no data is chopped during the shrink process). After shrinking the Windows volume, one can then boot up the Ubuntu Live CD and format the free space for an Ubuntu install.
The GParted Method
If your situation is exactly like the hypothetical one mentioned in the beginning of this article, it would be in your best interest to look into a program called GParted that is located on the Ubuntu Live CD. Once the CD is running on your machine (using the Trial Version option), look for Gparted under System -> Administration.

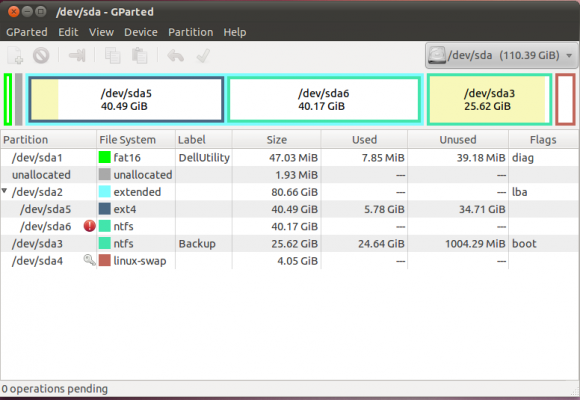
This is what the program looks like when loaded up. As one can see, this hard drive has a few partitions on it already, with the main one being Windows (sda5). GParted allows the user to create, delete, and re-format any partition on their hard drive with just a few simple clicks, at their own risk of course.
Dual Booting with GParted
Here’s how our hypothetical person would go about fixing his computer for a dual boot situation. First things first: clearing the 80 GB abomination containing the corrupt and villainous Windows partition.
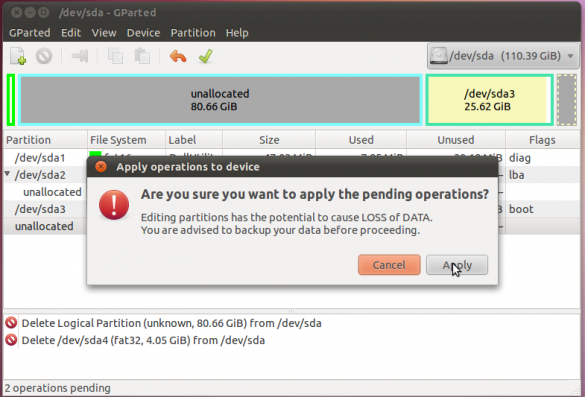
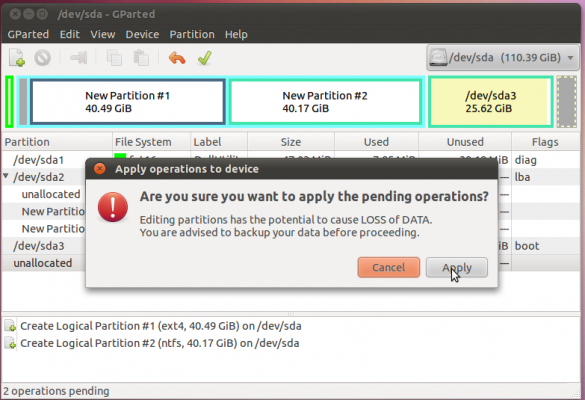
Next, we take that cleared 80 GB and split it into two parts, one for Ubuntu and one for Windows, noting that we can make them any size we want out of the free space.
Note that one of the partitions is in NTFS format (for Windows), and the other is in ext4 format (for Ubuntu). After allowing GParted to finish its splitting task, the hard drive in question looks parted this:
And there you have it: two partitions fully spaced and formatted for a dual boot situation. As always with extensive computer tweaking, be mindful of what you are doing and be sure to be fully understand the risks involved.
This method of creating two different partitions for dual booting is just one way to do it. In actuality, there are numerous ways to format the drive to allow for dual booting with Ubuntu. This website does a great job of giving all the options for a partitioned Ubuntu hard drive. A nice alternative from this site is to try creating small partitions for the base operating system data, and then creating a “Swap” partition to share all your personal data and media between Windows and Ubuntu. Ultimately, whichever method you choose, be mindful of the risks involved with partitioning and formatting and be sure to back up your data.
Final Note: OS Installation
Now that the hard drive is in a condition to allow installing, let me give one more tip for a clean dual boot situation. The main bootloader for Ubuntu 10.1 is called Grub2, and presents itself every time you boot up your computer. If you want to continue having Grub2 manage your operating systems in a dual boot scenario install Windows first on the machine, then Ubuntu. Windows also has a bootloader, and it does not like to show you that there is another OS on the computer. It is a jealous type.
If you make the mistake of installing Ubuntu first then Windows, there are some sites you can go to (here and most importantly here) to see how you can restore the Grub2 using the Ubuntu Live CD and a terminal.
So from one hypothetical computer user to another, join the next generation of users. Become a dual booter today.
Image courtesy: DeclanTM

Leave a Reply
You must be logged in to post a comment.