 Now that you can download and install the Windows 7 Release Candidate for free, many people are anxious to give it a try but aren’t quite ready to install it as their primary operating system. The easiest and safest way to test out the new version of Windows is to install it in a virtual machine, but that typically limits the virtual system’s resources and doesn’t always give you the full experience.
An alternative method is to install Windows 7 while keeping your current operating system installed, which is referred to as dual booting. This allows you to choose which operating system you want to use each time you start up the computer, and allows both systems to make full use of your computer’s resources.
Note: This guide will require you to install an operating system, modify hard drive partitions, and potentially use a LiveCD. If you’ve never done any of these things before, it might be best for you to follow our guide on how to install Windows 7 on a virtual machine instead.
1. Download and Burn Windows 7
Download the Windows 7 Release Candidate ISO from Microsoft’s Customer Preview Program website (you will need to log in with your Windows Live ID before you can download the file). This file is an image of the installation disc which can be burned directly to a blank DVD.
I recommend using ImgBurn (free, Windows) to burn the file.
If your computer doesn’t have a DVD drive (or any optical drive, for that matter) it is possible to run the installation disc from a bootable USB hard drive or a bootable USB flash drive as well.
2. Partition your Hard Drive
Partitions are individual storage areas within your hard drive (think of them as hard drives within a hard drive), and to install Windows 7 you’ll need to free up some space. To do this, we will be reducing the size of your original partition and creating a new partition to hold Windows 7. This procedure will vary by operating system, so I’ll provide details on a few popular ones.
Note: Partitioning your hard drive can potentially result in loss of data if something goes wrong. Make sure to back up all important data before proceeding!
Windows XP / Linux
In this guide I’ll be using the free, open source GParted LiveCD to modify and create partitions. LiveCDs are special versions of an operating system that can be used directly from the disk – no installation required.
For more detailed information on modifying partitions with GParted (with lots of pictures), check out HowtoForge’s guide.
- Download the GParted LiveCD and burn it to a CD.
- With the CD still in your computer’s optical drive, reboot your computer and choose to boot from the CD.
- Select your main partition (you may only have one) and resize it you have enough extra space to hold Windows 7.
- I recommend providing Windows 7 with at least 20 GB, so subtract your current size by at least 20480 MB.
- In the empty space that resulted from the resizing, create a new NTFS partition and give it a name.
- Click the Apply button to execute the changes.
Windows Vista
Windows Vista includes an impressive partition management tool, although it is fairly well hidden. To shrink your current partition and create a new partition for Windows 7, follow these steps:
- Open Control Panel –> System and Security –> Administrative Tools: Create and format hard disk partitions.

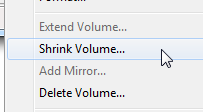
- Right click the partition you would like to resize and click ‘Shrink’.

- I recommend providing Windows 7 with at least 20 GB, so subtract your current size by at least 20480 MB.
- Click Shrink to resize the partition.
- Right click the newly created space and select ‘New Simple Volume’.
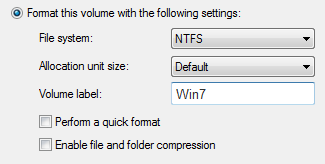
- Set ‘File System’ to NTFS and name the volume.

3. Install Windows 7
Now that you’ve done all that work, the rest of the process is fairly straightforward. Insert your newly burned Windows 7 DVD into your optical drive and reboot your computer. Be sure to choose to boot from the disk if prompted.
When going through the initial installation steps, you will be prompted to choose an installation type. Select ‘Custom (advanced)’, which will allow you to select the Windows 7 partition you created in Step 2. Be careful when choosing the installation partition because that partition will be formatted before installation and all previous data will be lost.
Windows 7 will take some time to install and your computer may restart several times. You will need to enter your license key as well as some initial setup information during this process.
4. Dual Booting
Windows XP / Vista
If you installed Windows 7 with Windows XP or Windows Vista on your computer, you’re already finished!
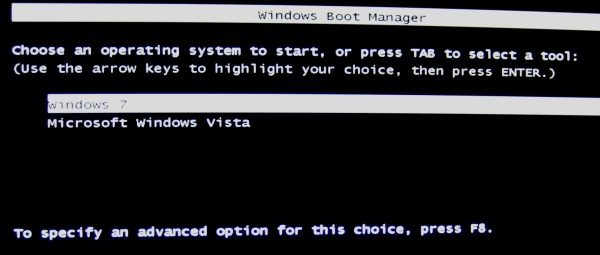
Next time you start up your computer, you will be presented with a special menu that will let you choose which operating system to run.
Linux
Since the Windows Boot Manager only recognizes Windows-based operating systems, you won’t be able to access your Linux distribution temporarily. If you were using the GRUB bootloader before installing Windows 7, it will have lost priority to the Windows Boot Manager and will no longer be visible when you start up your computer.
To restore the GRUB bootloader, follow these steps:
- Boot into your Linux distribution’s LiveCD.
- Open the Terminal application and enter the following commands:
- sudo grub
- find /boot/grub/stage1
- This command will identify where GRUB is currently installed and may be needed in the next step.
- root (hd0,0)
- Note that (hd0,0) refers to the hard drive and partition where you originally installed the GRUB bootloader. If you don’t know where GRUB is located, use the location you found in Step 2.
- setup (hd0)
- quit
GRUB will now be re-enabled, but it won’t know where your Windows 7 partition is located since you installed it after you originally installed Linux.
To add Windows 7 to your GRUB bootloader:
- In Terminal, enter the following command:
- sudo gedit /boot/grub/menu.lst (If your GRUB configuration file is located somewhere else, point to that file. Mine was located at /media/disk/boot/grub/menu.lst)
- Locate the example section for Windows installations (it will be commented out with #’s as shown below):
# title Windows 95/98/NT/2000
# root (hd0,0)
# makeactive
# chainloader +1 - Uncomment this section by removing the #’s and change the second line ‘root (hd0,0)’ to the partition where you installed Windows 7.
- For example: If you installed Windows 7 on your first hard drive on partition 4, the command would be ‘root (hd0,4)‘. If you are unsure of your partitions, launch gparted from Terminal with the sudo gparted command.
- Save this file and reboot your computer.
Congratulations! GRUB Should now be restored and let you choose either operating system when you boot up your computer.


Leave a Reply
You must be logged in to post a comment.