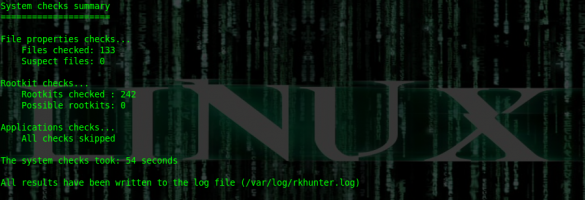
 As most are aware, there are very few viruses written for the Linux OS. There are, however, 242 known rootkits that can cause catastrophic damage to a Linux box. This post covers a rootkit detector called rkhunter. It is available from the repositories and is actively maintained at the time of posting.
Don’t know what a rootkit is? For the extended basics, a document titled Linux RootKits for Beginners – From Prevention to Removal is available from the Sans Institute, in pdf format here, or viewable via Google Docs here.
Getting Started
Once you’ve learned about rootkit basics (or already have a working knowledge of them), install and setup rkhunter on a system you know to be clean with these commands:
[code lang=”shell”]
sudo apt-get install rkhunter
sudo rkhunter –update –propupd –pkgmgr dpkg
[/code]
The –update switch updates rkhunter’s definitions of known rootkits. When –propupd is used, essentially you’re telling rkhunter that the system files it’s about to index are clean. If system files undergo changes after they are indexed by rkhunter, the next scan will show that in the results. The –pkgmgr dpkg option is Debian-specific.
Be aware that there are risks involved, per the warning from rkhunter’s man page:
WARNING: It is the users responsibility to ensure that the files on the system are genuine and from a reliable source. rkhunter can only report if a file has changed, but not on what has caused the change. Hence, if a file has changed, and the –propupd command option is used, then rkhunter will assume that the file is genuine.
The only way to be perfectly assured (well, as close to perfect as possible) a system is clean is if you have just installed the OS, and haven’t downloaded anything outside the repositories. If your install is clean, then rkhunter will prove mighty useful as an addition to your security protocol.
I choose to start rkhunter with these options:
[code lang=”shell”]
sudo rkhunter -c –sk
[/code]
The -c option tells rkhunter to run through three main checks: file property changes, rootkits, and application checks. The –sk option means skip keypress, so each check runs without user intervention. When rkhunter completes its audit, it displays a summary on the screen and writes a log file:
* NOTE * — There are two false positives to be aware of. In the very last check rkhunter performs, this shows up on many machines:

These can safely be ignored.
There are many other ways to run rkhunter. The –cronjob option, I assume, sees its fair share of use. It integrates three options into one: –check, –nocolors and –skip-keypress (the same as –sk).
Keep tabs on your Linux installation! There is almost nothing worse than having your box rooted without your knowledge. Sure, the chances of being rooted are slim… unless you download just one file, from just one source you think you can trust, that contains a rootkit.
What other security tools do you find useful in your Linux distribution?


Leave a Reply
You must be logged in to post a comment.