Previously, I suggested that if you wanted to test out the newly released Windows 7 RC, that it may be a good idea to test it on a Virtual Machine. In this article I will go into the details of virtual machine installation process for Windows 7 on two common pieces of virtualization software, VMware Server and VirtualBox.
Important: Before installing virtual machine software or a virtual machine, make sure that you system has the appropriate resources to handle such tasks. A virtual machine is a computer sharing the same resources that your current operating system and programs are using. If you allow a virtual machine too much access to system resources, a very unstable system will result.
Before You Begin
You will begin by downloading the Windows 7 RC ISO. After downloading the ISO, select the virtualization software that you would like to use, either VirtualBox or VMware Server. For this guide, I will be using both VirtualBox 2.2.4 and VMware Server 1.0.9.
Install the virtualization software of your choice. Once you have the virtualization software installed, you can proceed to the steps below that pertain to your choice:
Installing Windows 7 on Virtual Box
- Start VirtualBox.
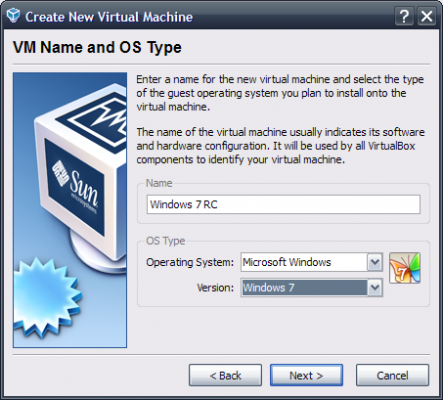
- Click the New button click Next.
- Enter information as shown below:
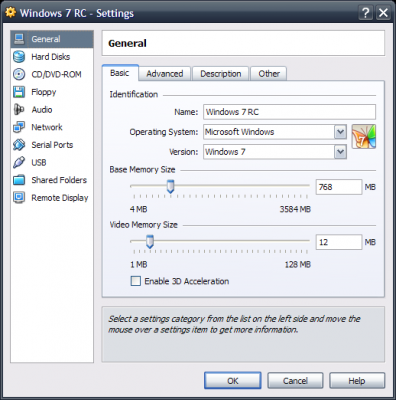
- Set the amount of physical RAM to dedicate to your virtual machine. To prevent system instability, it is a good idea to not enter more than 50% of your total physical memory. (Use caution with this setting.)
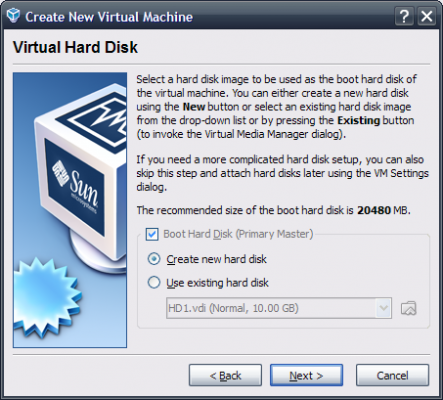
- Select Create New Hard Disk and click Next.
- Click Next.
- Select Dynamically expanding storage and click Next. (Dynamically expanding storage initially occupies a very small space on your physical hard drive. It will then grow up to the size specified as your virtual machine claims disk space.)
- Enter the size of the virtual hard disk. I chose 20 GB for my drive.
- Click Next and finish.
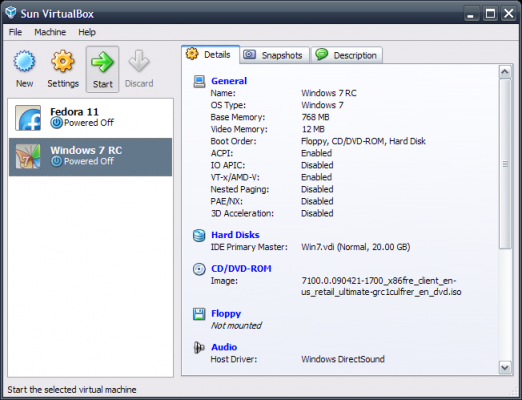
- Click the Settings button and the screen below will appear:
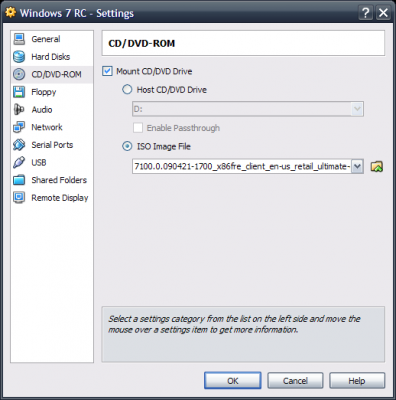
- Click CD/DVD-ROM on the left side.
- Click the ISO Image File button and select the location of your recently downloaded Windows 7 ISO image.
- Once the ISO image has been selected, click Ok.
- Click the Start button to boot the virtual machine.
- Once the virtual machine has been started, it will boot from the ISO image that you mounted in the CD/DVD drive.
- Follow the remainder of the steps to install Windows 7 onto the virtual machine. Installation time will vary based on the speed of your computer.
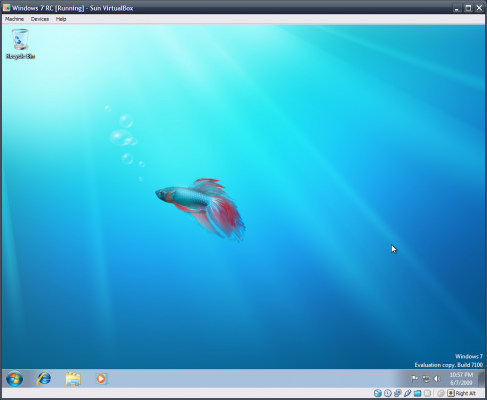
- When the installation has completed, you will be presented with the Windows 7 desktop as shown below.
- Now that Windows 7 has been installed on to the virtual machine, it is important to install Guest Addons. Guest Addons install the appropriate drivers and other software to make interaction with the virtual machine easier.
- From the VirtualBox menu, select Devices -> Install Guest Addons.
- Click Run and Yes at the next screens, respectively.
- Install the software into the virtual machine with the preselected default settings.
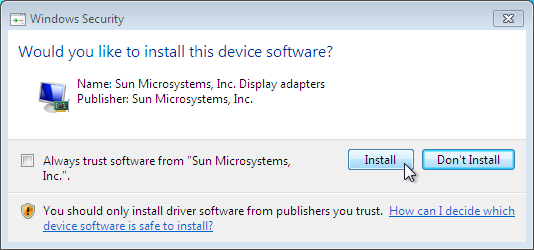
- When asked, install the software devices as shown below:
- When finished, reboot the virtual machine and you can now begin using Windows 7.
Installing Windows 7 on VMware Server 1.0.9
- Start VMware Server 1.0.9.
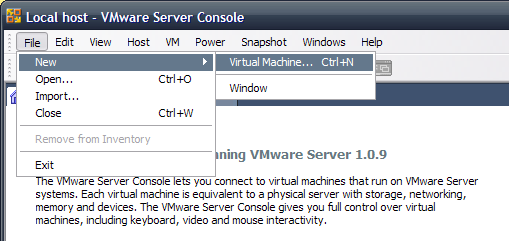
- Select File -> New -> Virtual Machine.
- Click Next.
- Select the Custom button and click Next.
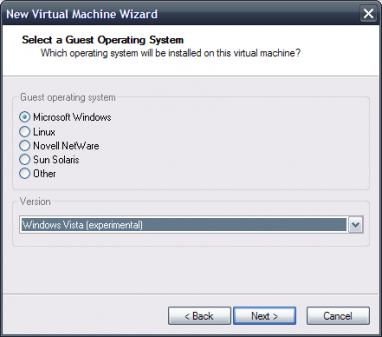
- Select the Microsoft Windows button and Windows Vista (Experimental) from the drop down menu as shown:
- On the next window, give your virtual machine a name, select the location to save the virtual machine, and click Next.
- Click Next on the next two windows as these settings are not necessary for most people.
- In the next screen, choose how many cores you want to dedicate to your virtual machine (one or two). Only one is necessary although two may improve virtual machine performance.
- Set the amount of memory for the virtual machine. To prevent system instability, it is a good idea to not enter more than 50% of your total physical memory. (Use caution with this setting.)
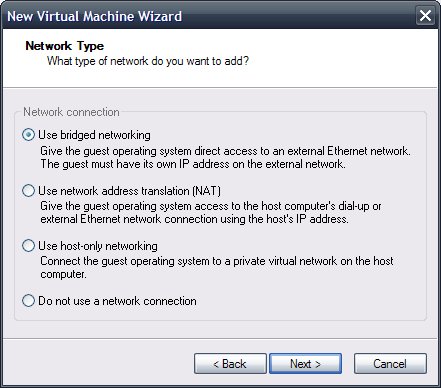
- Click Next to select Bridged Networking. (NAT will also work.)
- Click Next to use the preselected LSI Logic SCSI adapter.
- Select the Create a New Virtual Disk button and click Next.
- Click Next to use the SCSI Adapter.
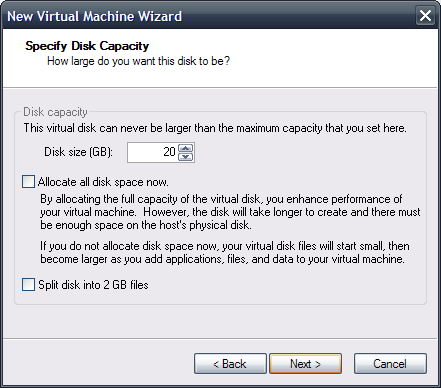
- Enter the size of the virtual hard disk and uncheck the Allocate All Disk Space Now check box. If this is not done, VMware server will proceed to create a file of the size you specified.
- In the next window, specify a name for your newly created virtual hard drive and click Next.
- You will now be brought back to the initial VMware Server window.
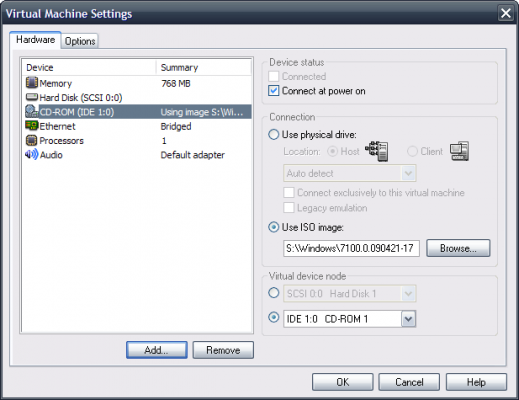
- Click Edit Virtual Machine Settings on the left side. The window below will be shown:
- Click the CD-ROM on the left side and select the Use ISO Image button on the right.
- Click Browse and navigate to the location of the Windows 7 ISO DVD image that you previously downloaded and click OK.
- Click ‘Start This Virtual Machine’ and proceed through the Windows installation. Installation time will vary based on the speed of your computer.
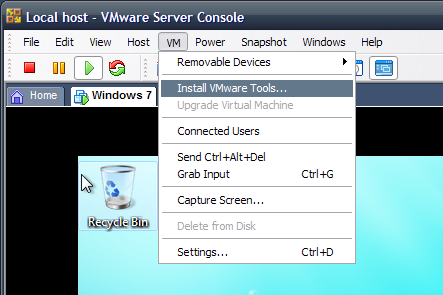
- Select VM -> Install VMware Tools.
- Click Install and proceed through the installation.
- Select the Typical Install button when prompted to choose installation method.
- Once the VMware Tools installation has completed, reboot the virtual machine to begin using Windows 7.
You should now be running Windows 7 in a virtual machine. In this environment, you will be able to test Microsoft’s forthcoming operating system without permanently installing it on your current system.

Leave a Reply
You must be logged in to post a comment.