 Let’s say you want to be the next Peter Jackson or George Lucas. That’s far from realistic, but let’s say you just want to be a film-making hobbyist and don’t exactly have the budget for a decent video camera and all of the accompanying equipment. After all, it can literally add up to thousands of dollars.
Just because you can’t afford the high-quality equipment doesn’t automatically mean that you should give up producing quality videos. This guide will prove that you don’t need to spend a lot of money to get good results.
[adrotate banner=”1″]
The Camera
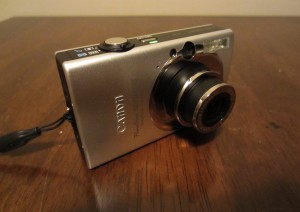
First off, you need a camera to shoot video (obviously). Unless you plan on spending over $500, you’ll probably end up with a point-and-shoot camera. This isn’t a bad thing, since a lot of newer point-and-shoots record pretty good video. I went with the Canon ELPH 300 HS for $150 (it was as low as $130 on Cyber Monday). It shoots full 1080p HD video at 30 FPS, has a wide 24 mm lens, a CMOS sensor (as opposed to the inferior CCD sensor, which most point-and-shoots have) and a Digic 4 processor (the same processor that’s in the 1D Mark IV). For the price, it’s an amazing camera.
Now that you have your point-and-shoot camera, it’s time to make the magic happen. I’ve gathered up some great tools and methods for shooting great quality video on a point-and-shoot budget. Let’s give them a try.
Image Stabilization

Stabilization is one of the most important aspects of a great quality video. You don’t want your video shaking all about to the point that your viewers start to get motion sick. Stabilization can be accomplished using several methods.
The most obvious stabilization technique is using a tripod. You can get a cheap tripod on eBay for less than $20. While they won’t have fluid heads or be rife with features, you get a decent stand to mount your camera onto, which is all you need most of the time.
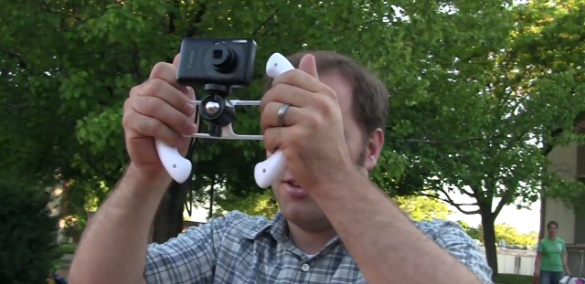
If you want to shoot moving action shots, you can get what’s called a “fig rig”. It basically adds handles to your camera so that you get a better-stabilized shot. A real fig rig costs hundreds of dollars, but you can make your own mini fig rig for your point-and-shoot for about $5. All you need is a Nintendo Wii steering wheel remote adapter from the dollar store and a mini ballhead that you can get on eBay. Instructions/Demo here.
Lighting

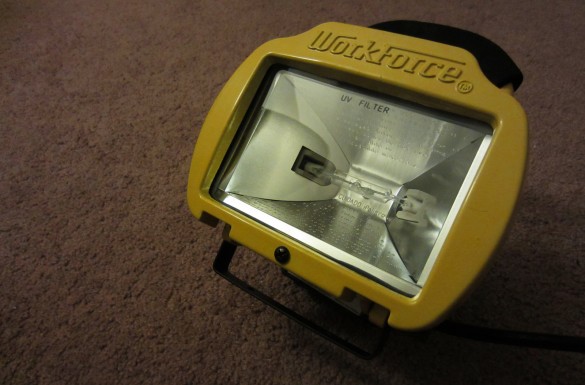
Lighting is also one of the most important aspects of a great quality video and it can certainly be what makes or breaks your video. Your subject needs to have adequate lighting in order for the shot to turn out well. Lamps and other usual light fixtures in a home just don’t cut it by themselves. I’ve found that construction work lights are great for adequate lighting and the type of light source they provide is actually not much different from those fancy lights you see in television studios. You can get a pair of high-powered, halogen work lights for around $40 at any hardware store. I ended up getting a pair of smaller 250 W work lights for $8 a piece. They work great!
You can also go the even cheaper route and get clamp lights with reflecting hoods, which cost about $5 a piece and you can use any type of screw-in bulb that you want. However, since you’re using a household lightbulb, you won’t get the power and brightness of a halogen work light, so just keep that in mind.
Time Lapse

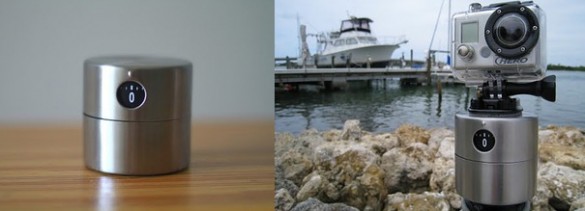
We all love a good time-lapse video because they’re so mesmerizing to watch, and a lot of filmmaking hobbyists enjoy making them. Most point-and-shoots come with a time-lapse feature on board, making the process even easier, but you can add even more quality to your time-lapse videos by adding a panning motion. A cheap and easy way to accomplish this is to mount your point-and-shoot on a kitchen timer. Obviously, kitchen timers make a complete rotation every 60 minutes, which makes them great for getting a nice, slow panning motion during the time-lapse. I prefer Ikea’s Ordning Kitchen Timer that can be had for $6. It not only looks cool, but it has a smooth, flat surface that makes it easy to stick your point-and-shoot on. Instructions/Demo here.
Slider Dolly

A slider dolly is one of the coolest filmmaking accessories around. It’s a simple device that gives you smooth, gliding shots of a subject and just adds overall zing to your videos. A professional slider dolly can cost a few hundred dollars (even more than that at times), but fortunately, there are ways to build your own slider dolly that can achieve very close to the same effect. There are literally dozens of different ways to build one and a quick Google search will get you in the right direction. The slider dolly that I built (seen above) cost me only around $15!
You can also get slider dollys that move on wheels rather than a track system. Cineskates are a great example of this. It’s basically a Joby GorillaPod that has three rollerskate wheels attached to the legs. However, you probably took a peek at the price tag, which reads $200 just for the wheels ($300 for the whole system). Fortunately, you can assemble your own removable wheels to attach to a GorillaPod for the price of rollerskate wheels and a few small hardware parts.
Be Creative
In all honesty, the most important thing to keep in mind when making a quality video with a point-and-shoot camera is to just be creative, and there are hundreds of different ways that can be done. Are there tools and methods that you know of that aren’t in this guide? Let us know about them in the comments!

Leave a Reply to TWaller Cancel reply
You must be logged in to post a comment.